
🕑 Estimated reading time: 15 minutes | Last updated: April 9, 2026
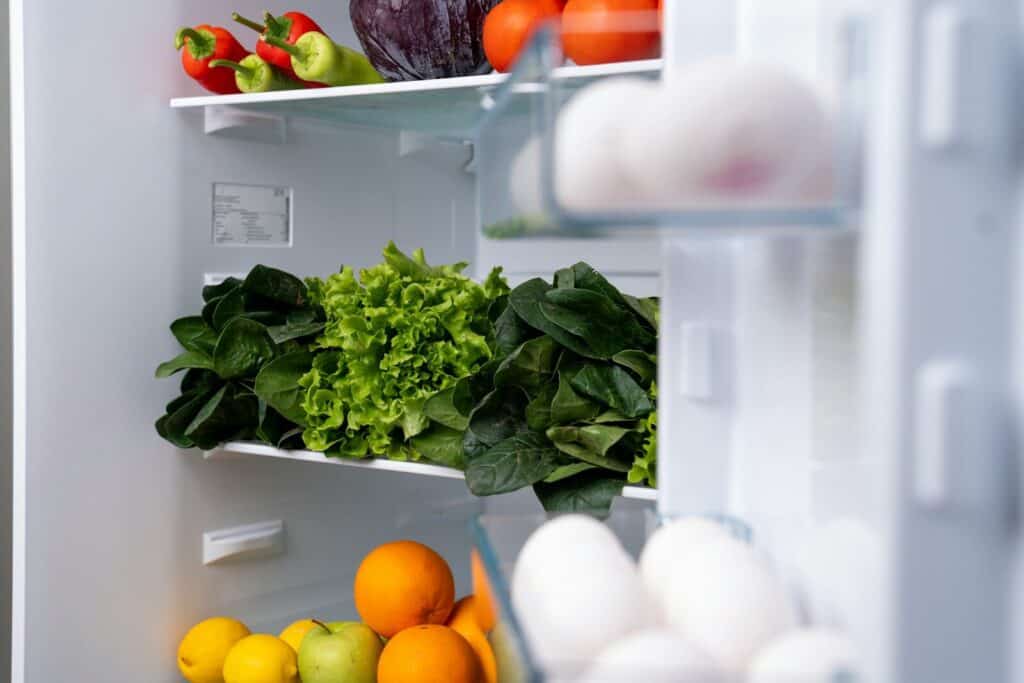
To clean a refrigerator step by step: unplug it, remove all food and shelving, wipe every interior surface with a baking soda and warm water solution, scrub shelves and drawers in the sink with dish soap, clean the door seals with a toothbrush and vinegar, dry everything thoroughly, replace shelves, return food, and place an open box of baking soda inside to absorb future odors. Total time: 45 to 60 minutes.
Open the fridge, catch a whiff of something you cannot quite identify, and close it again quickly. We have all been there. A proper clean takes less time than most people expect, and it makes your food last longer too.
Learning how to clean a refrigerator step by step is a skill that pays off in food safety, appliance longevity, and daily kitchen comfort. Your refrigerator is the one appliance in your kitchen that never gets a day off. It runs continuously, stores everything you eat, and is touched dozens of times every day. Yet for most households, a thorough refrigerator clean happens far less often than it should, which means the appliance quietly accumulates spills, mold, bacteria, and odors that affect the quality and safety of every food item stored inside it.
According to food safety guidelines from the U.S. Food and Drug Administration, bacteria multiply rapidly on food contact surfaces that are not regularly cleaned. A refrigerator that appears clean on the surface can harbour bacteria in its door seals, drawer tracks, and the gaps around the shelving supports that are invisible to a casual glance. Knowing how to clean a refrigerator step by step thoroughly addresses every one of these hidden areas, not just the obvious spills.
Table of Contents
Why Cleaning Your Refrigerator Step by Step Matters More Than You Think
Think of your refrigerator like a sealed ecosystem. It maintains a controlled temperature environment that slows bacterial growth, but it does not stop it entirely. Most refrigerators are set between 1 and 4 degrees Celsius, which is cold enough to significantly slow the reproduction of most harmful bacteria but not cold enough to halt it. Bacteria that colonise the surfaces of the fridge itself multiply slowly and continuously, spreading to the food stored nearby through direct contact and through the air inside the sealed compartment.
Listeria monocytogenes is one of the most significant refrigerator-related food safety concerns because it is one of the few harmful bacteria that continues to grow at refrigerator temperatures. The Centers for Disease Control and Prevention specifically recommends cleaning the refrigerator regularly as a key prevention measure for Listeria contamination. Thankfully, cleaning a refrigerator step by step with the right materials eliminates this risk completely and keeps the interior genuinely hygienic between cleaning sessions.
Beyond food safety, a dirty refrigerator runs less efficiently. Accumulated food residue and spills on the interior surfaces act as insulation, causing the compressor to work harder to maintain the set temperature. Dirty condenser coils reduce heat exchange efficiency by up to 30 percent, which translates directly to higher electricity consumption. A clean refrigerator is not just safer and more pleasant to use; it is measurably less expensive to operate.
What You Need Before You Start the Step-by-Step Refrigerator Clean
Gathering everything before you begin makes the process of cleaning a refrigerator step by step smooth and uninterrupted. You will need warm water, baking soda, white distilled vinegar, liquid dish soap, microfibre cloths or soft clean rags, an old toothbrush, paper towels, a large bowl or bucket, a cooler bag or insulated box for food, and optionally a spray bottle for your cleaning solution.
The cleaning solution of choice for the refrigerator interior is one tablespoon of baking soda dissolved in one litre of warm water. This solution is food safe, deodorising, and effective at dissolving the protein-based residue from food spills. White vinegar diluted with equal parts water adds mild antibacterial action and works particularly well on mold in the door seals. Both are far preferable to chemical cleaners inside a food storage appliance.
Step 1: Unplug the Refrigerator and Remove All Food
The first step to clean a refrigerator step by step is to unplug it from the wall socket. This serves two purposes: it prevents the compressor from running unnecessarily while the door is held open for an extended period, and it eliminates any electrical risk during cleaning around water.
Transfer all refrigerated food to a cooler bag with ice packs or to a second refrigerator if you have one. As you remove food, check every item for expiry dates and signs of spoilage. A refrigerator clean is the perfect opportunity to audit your food stock and dispose of anything that is expired, moldy, or of uncertain age. Any food that is questionable should be discarded rather than returned to a clean refrigerator.
Remove everything, including small condiment bottles, jars, and anything stored in the door. Place them in a cool location while you clean. Leave the fridge door open for five minutes to allow the interior to reach room temperature, which makes cleaning solutions more effective and makes it easier to spot and remove dried or cooked-on spills.
Step 2: Remove and Soak All Shelves and Drawers
The second step when you clean a refrigerator step by step is to remove every removable component: glass or wire shelves, vegetable and fruit drawers, door storage bins, egg trays, and any other removable inserts. Allow glass shelves to warm to room temperature for ten minutes before washing them in warm water; placing cold glass directly in warm water can cause thermal shock cracking.
Fill your sink with warm soapy water and submerge the shelves and drawers. Allow them to soak for ten minutes, which loosens dried food residue without requiring aggressive scrubbing. Use a soft sponge or cloth to wash each component. For stubborn dried spills, apply a small amount of baking soda paste (baking soda mixed with just enough water to form a thick paste) and let it sit for a few minutes before scrubbing. Rinse thoroughly and set aside to air dry completely before returning them to the fridge. Never replace wet shelves in the refrigerator, as the moisture will contribute to mold growth.
Step 3: Clean Every Interior Surface of Your Refrigerator Step by Step
This is the most thorough step of the entire process. With all shelves and drawers removed, the interior of the refrigerator is fully exposed and accessible. Dip a microfibre cloth or sponge into your baking soda solution and begin wiping from the top of the interior working downward, so that any loosened residue falls to surfaces you have not yet cleaned rather than onto surfaces you have already done.
Wipe the ceiling of the interior, the side walls, the back wall, and the floor of the main compartment. Pay particular attention to the shelf support tracks, which typically run along both side walls and accumulate a mixture of food residue, condensation deposits, and mold that is rarely addressed in a casual clean. Use your old toothbrush dipped in the baking soda solution to scrub the shelf tracks, the corners, and any grooves or ridges in the interior surfaces.
For stubborn stains or dried spills that the baking soda solution does not fully remove, apply the solution directly to the spot and cover it with a damp cloth for five minutes to allow it to soften before scrubbing. This technique resolves virtually all dried food residue without requiring abrasive scrubbing that could scratch interior surfaces.
After wiping with the baking soda solution, go over all surfaces once more with a cloth dampened with clean water to remove any baking soda residue. Dry thoroughly with paper towels or a clean dry cloth. The interior should be completely dry before you replace the shelves.
Step 4: Tackle the Door Seals When You Clean a Refrigerator Step by Step
The door seal, also called the door gasket, is the rubber strip that runs around the perimeter of the refrigerator door and creates an airtight seal when the door is closed. It is also one of the most neglected parts of the refrigerator and one of the most significant sources of mold and bacteria. The folds of the rubber gasket trap moisture, food particles, and organic residue that provides ideal conditions for mold growth.
Pull back the folds of the seal and inspect the interior surface. You will likely find dark spots of mold, accumulated debris, and dried residue in the creases. Use a cloth dipped in undiluted white vinegar to wipe out all the folds, then use your toothbrush dipped in vinegar to scrub the creases and remove embedded mold and residue. Work all the way around the door, including the corners where the seal meets itself.
After scrubbing, wipe the seal with a clean damp cloth to remove all vinegar and loosened debris, then dry thoroughly. A dry seal is a mold-resistant seal. Going forward, wipe the door seal weekly with a damp cloth to prevent accumulation from forming between your quarterly deep cleans.
Step 5: Clean the Freezer Compartment
If your refrigerator has a separate freezer compartment, it also needs attention during a thorough clean. Transfer all frozen food to your cooler with ice packs. If there is significant ice buildup, place bowls of warm water inside the freezer compartment and close the door for five minutes to soften the ice before attempting to remove it. Never use sharp objects to chip ice away as this can puncture the liner or damage the cooling coils.
Once the ice has softened, use a plastic scraper or a wooden spatula to gently remove it. Wipe all interior surfaces with the baking soda solution and dry thoroughly before returning the food and plugging the refrigerator back in. A clean freezer also operates more efficiently, as heavy frost buildup acts as insulation that forces the compressor to work harder.
Step 6: Clean the Refrigerator Exterior
The exterior of the refrigerator deserves as much attention as the interior when you clean a refrigerator step by step. The top surface accumulates dust, grease, and kitchen grime. The sides gather fingerprints and splashes. The handle is one of the most frequently touched surfaces in the kitchen and harbours bacteria accordingly.
For stainless steel exteriors, wipe with a microfibre cloth dampened with a diluted dish soap solution, always wiping in the direction of the grain to avoid scratching. Dry immediately and buff with a dry cloth to prevent water spots. A small amount of baby oil or mineral oil applied to a cloth and buffed over stainless steel removes smudges and restores the finish beautifully. For painted or plastic exteriors, an all-purpose kitchen spray cleaner works well. Wipe the handle thoroughly with a disinfectant wipe or a cloth dampened with diluted white vinegar.
Step 7: Clean the Condenser Coils
This step is one that most people never do, yet it is one of the most impactful for the refrigerator’s operating efficiency and lifespan. The condenser coils release the heat extracted from the refrigerator interior into the room. When coils are coated in a layer of dust and pet hair, their ability to transfer heat is significantly impaired, which forces the compressor to run longer and harder to maintain the set temperature.
Condenser coils are located either at the back of the refrigerator (on older models) or underneath it, accessible behind a kick plate at the bottom front. Unplug the refrigerator before cleaning coils. Use a vacuum with a brush attachment to remove accumulated dust from the coils and the surrounding area. A refrigerator coil brush, available for a few dollars at any hardware store, can reach into the gaps between coil rows that a vacuum brush cannot access.
Pull the refrigerator away from the wall to access the rear coils and to clean the floor area beneath and behind the unit, which typically accumulates a significant amount of dust and debris over time. This area also allows you to check that the refrigerator’s ventilation space is adequate; most manufacturers recommend at least five centimetres of clearance around the sides and rear.
Step 8: Reassemble and Organise Your Refrigerator Step by Step
Once all surfaces are clean and completely dry, replace the shelves and drawers and plug the refrigerator back in. Allow it to return to its operating temperature (this typically takes fifteen to thirty minutes) before returning food to the interior.
Use this opportunity to organise your refrigerator logically rather than simply returning food to where it was before. The coldest area of most refrigerators is the bottom shelf, making it the ideal location for raw meat and fish (which should always be stored in sealed containers on the lowest shelf to prevent any drips from contaminating other food below). The middle shelves are ideal for dairy products, leftovers, and ready-to-eat foods. The top shelf suits drinks, condiments, and items that do not require very cold temperatures. The door is the warmest part of the refrigerator and is best suited to condiments, juices, and items with natural preservatives, not dairy or eggs as is commonly assumed.
Step 9: Eliminate and Prevent Odors When You Clean a Refrigerator Step by Step
Even a spotlessly clean refrigerator can develop odors over time from the natural off-gassing of foods stored inside. Placing an open box of baking soda on a shelf actively absorbs these odors through a chemical neutralisation process. Replace the baking soda every thirty days for continuous odor absorption. An alternative that some people prefer is a small bowl of fresh coffee grounds, which absorbs and masks odors with its own pleasant scent. Activated charcoal, available in small sachets from pet stores and online, is the most scientifically effective odor absorber and can be recharged by placing it in sunlight for a few hours.
For this and related kitchen hygiene practices, see our guide on how to keep food fresh longer, which covers the storage habits that prevent odor-causing spoilage in the first place.
✅ Interactive Refrigerator Cleaning Checklist
Tick each step as you complete it. Your progress saves automatically.
0 of 9 steps completed
Clean the shelves and check what goes back in
Knowing how to clean a refrigerator step by step transforms what can feel like a daunting task into a manageable, methodical process that takes under an hour and produces genuinely impressive results. The nine steps in this guide cover every part of the appliance from the deepest interior corners to the condenser coils, ensuring both a hygienic food storage environment and a well-maintained machine that operates efficiently.
The key habits that keep the refrigerator clean between full cleaning sessions are simple: wipe spills immediately when they happen, wipe the door seal weekly, check food expiry dates when you do your grocery shopping, and run the full nine-step process every two to three months. These habits, combined with the thorough clean covered in this guide, ensure that your refrigerator stays a clean, safe, efficient appliance for years to come.
✅ Key Takeaways
- Baking soda solution is the safest and most effective interior cleaner for refrigerators.
- Door seals are the most commonly neglected and most bacteria-prone part of the fridge.
- Cleaning condenser coils twice a year can reduce electricity consumption by up to 30 percent.
- Organise food by temperature zone after cleaning for maximum food safety.
- An open baking soda box on a shelf continuously absorbs future odors between cleans.
🔗 Related Articles You Will Find Helpful
Frequently Asked Questions
Q1: How often should you clean a refrigerator step by step?
Do a full step-by-step clean every one to three months. Wipe the door seal weekly and clean spills immediately. Vacuum condenser coils twice a year.
Q2: What is the best homemade cleaner for the inside of a refrigerator?
One tablespoon of baking soda dissolved in one litre of warm water is the safest and most effective homemade refrigerator cleaner. It deodorises, dissolves food residue, and leaves no chemical residue.
Q3: How do you get rid of bad smells in a refrigerator?
Remove all food, clean every surface with baking soda solution, air out the interior for thirty minutes, and place an open box of baking soda or a bowl of activated charcoal inside to absorb future odors.
Q4: Can I use bleach to clean a refrigerator step by step?
Not inside. Bleach leaves chemical residue that contacts food. Use hydrogen peroxide at 3 percent concentration for interior disinfection. Bleach is suitable for exterior surfaces only.
Q5: How do you clean refrigerator coils?
Unplug the fridge. Locate coils at the back or under the unit. Vacuum with a brush attachment and use a coil cleaning brush for tight gaps. Clean twice a year for optimal efficiency.
Written by the Digital Bustle Editorial Team
The Digital Bustle team produces practical, research-backed guides on everyday home, tech, and kitchen problems. Every method in our articles is verified for safety and effectiveness before publication.